How to grow marijuana at home made simple
Growing marijuana has become big business, and there are numerous ebooks, videos, and guides all over the internet which delve into excruciating detail about the entire process. But what if you’re just looking for a basic setup to make enough for your own personal stash? Often you’ll see that many of these guides aren’t really helpful since you don’t need to create anything on the scale of these large operations. You’re just looking for a basic system that works. Well, I’m happy to let you know, that you’ve come to the right place. I’ve put together a simple guide to growing marijuana at home that won’t break your budget and will keep your stash packed for months.
Seeds
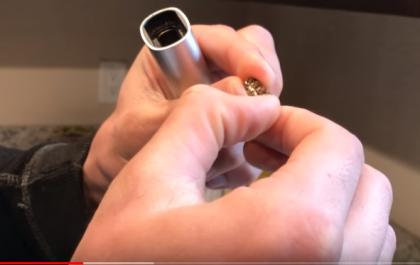
The first thing you are going to need to acquire are some cannabis seeds. Yes, you can use the ones that you pick out of your weed (if you find weed with seeds in it), but you’ll definitely get better results by getting some from a quality seed company such as Sensi Seeds, Dinafem, or countless others. Research the strain that interests you the most for your life and work and then find a company which sells them. I’d recommend starting out by buying some feminised seeds. This will ensure that all your plants are female, and you don’t have to worry about killing all the males half way through your grow (we only smoke the female plants). After you have got your seeds you’re going to need to germinate them. This can be done with water, and some paper towels. The video below shows the process of how to germinate your seeds.
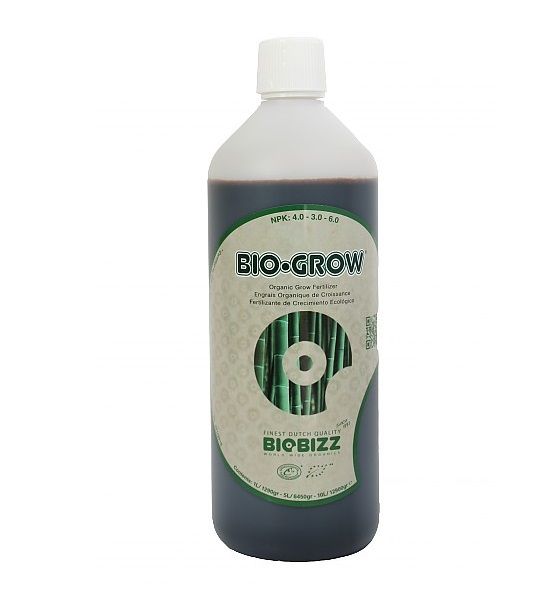
Nutrients
While your seeds are soaking you’re going to need to get some nutrients, or as we will refer to them as, nutes. Since you’re a total noob, and you want a small basic system, we’ll be growing in soil since it’s harder to screw up. So since you’re on a budget I’m going to recommend that you buy two things. One is something called BioGrow (or the equivalent) which has a bunch of Nitrogen and other stuff in it. Weed likes nitrogen and keeps it green. More does not equal better. So put in less than is recommended and wait until your seedlings are at least two weeks old before giving them anything other than water. Which brings us to the other thing you’ll buy.
PH Down. Sounds kind of scary doesn’t it? Well, no, not really. Water has a PH value. It can be alkaline, or acidic. We want it to be right in the middle since this is how our plants get nutrients. This should be quite cheap and will probably be available at your local growshop (for sure) or garden center. It comes in a bottle and you’ll need a little plastic syringe thingy to add it to your water. But how do you tell what the PH is of your local water supply? Well, you have to test it. I know, I know sounds complicated, but don’t worry it’s really simple. Head to your local pet shop that sells fish. Here you will find a bunch of little test kits which can test the PH value of water. Usually they’re just a little box that contains a tiny test tube, and some drops. The back of the box will have instructions on how many drops to add and will also probably have a little guide which shows the color of which the water will turn when it’s a certain PH. So what PH should water be for growing weed? 6.4 -7. Got it. Good.
Soil
You’re going to be creating a basic grow room indoors using soil. You’re going to want to buy a bunch of potting soil. How much? Well, around 20 liters per plant. But basically figure out how much soil you can fit into the containers which you’ll be using (you can just drill holes in the bottom of some 5 gallon buckets. ) . Add some Perlite to the soil (those are the little white stones you see in potting soil), this helps aerate the soil and makes plants happy. Wear a mask or cover your face when pouring the perlite into the soil mix. The dust from it is yucky and harmful to your health. Want to buy a good pre-mixed soil that all the cool kids use? Then buy some Fox Farm.
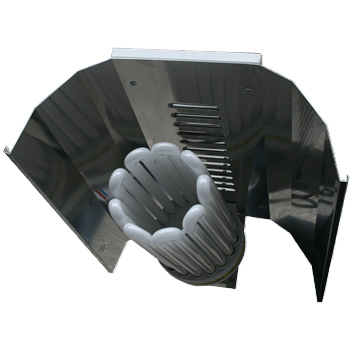
Light
Since you’re a total noob I’m going to recommend using a CFL (Compact Fluorescent Bulb) . These don’t get hot, and will save you money on your ventilation as well. There’s no ballasts, and you can just plug these straight into the wall. The envirolight available from the sidebar is a good place to start. The bigger the better of course. More light equals bigger buds. I’ve often seen beginners buy 1000 watt HPS bulbs which get stupid hot. Needless to say besides being more dangerous, they’re also tougher for a beginner to learn on. So you get some CFLs, you can actually buy these at Home Depot (yes, those bulbs for your everyday home use will work but you need a lot of them). But save yourself the time, and all the connectors and other nonsense you’ll have to buy, and just buy an envirolight (or the equivalent) that comes with a hood/reflector. You’re going to be putting this on a timer, so buy one of those too.
Ventilation
So, since you’re using a CFL you won’t need as much ventilation, but basically you want a steady flow of air coming into your grow space. Nonetheless, if you’re really serious get a squirrel cage fan and some ducting. Place the ducting at the top of your grow space and have it blowing air out (hot air rises) and then have a place at the bottom of your grow space allow air in (put a tiny fan here too if you’re feeling sassy). It’s cool to blow air directly at your plants and make them “tremble/shake” from the airflow. This makes them tough. Weightlifting for weed. If you don’t want to bother with a squirrel cage fan and ducting, then just buy two little fans. Have one blowing out at the top, and one blowing in at the bottom.
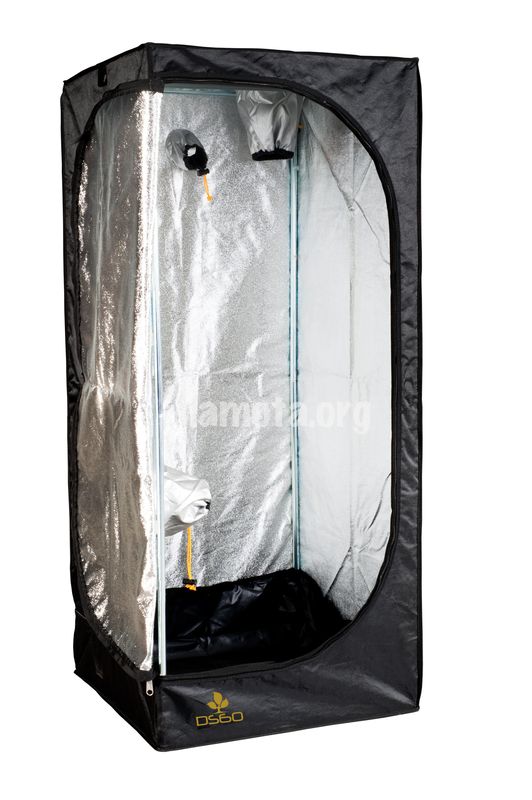
Grow Closet
So you need a place to grow weed indoors. This can be as simple as a closet, or you can buy a little grow tent. A grow tent is like a little closet that is flame proof and covered in reflective material. They’re light, simple to set up, and affordable. Hey look, they’ve got a hole at the bottom and top just like I said. Geniuses! Get the smallest one, there’s no need to go overboard in the beginning.
Don’t screw up!
Sorry, just wanted to keep you on your toes. Above you’ll find everything you need to start growing weed indoors simply. Sure, you can stretch a penny on anything above if you want and come up with alternatives but you live in a state/country with legal marijuana anyway so you should be able to just find the real materials anyway. If you don’t live somewhere it’s legal to grow then don’t do it! Getting caught can get you in trouble and that sucks.
So here are the bare bones basics you need to know regarding how to grow weed indoors.
Don’t water too much!
Overwatering is the biggest noob mistake. I know, you want them to grow faster. Well, then don’t keep them drown in water every day and let their roots grow and flourish. Happy roots, happy tops. Wait until the soil is TOTALLY dry before watering. Generally this will take 3 to 4 days.
Vegetative/Budding
Marijuana has two stages. The vegetative stage which is where they are just growing like weeds. And the budding stage, when the flowers begin to appear. We smoke the flowers. The budding stage will take anywhere from 50 to 80 days depending on the strain. In order to induce budding you’re going to change how much light your plants see a day. For vegetative growth keep them on 18 hours of light, and 6 of darkness (remember you bought that timer. yeah, this is what it’s for.) Then when you want to start budding them change the light they receive to 12 hours of light vs 12 hours of darkness (really, make sure it’s dark!)
Keep your light close!
The closer the light, the bigger the buds. Since you’re using a CFL you have an advantage in this regard because it is harder to burn your plants since these bulbs don’t get too hot.
The Royal Flush
Once your buds are nice and fat, and your leaves begin turning yellow (don’t freak out, they think it’s fall and the plant is dying), and during the last two weeks of your budding cycle, you’re going to want to “flush” your plants. This means you give them a ton of water with no nutrients. Put them in the bath tub and just fill the container a bunch of times and let all the water drain. Repeat as many times as you wish, but generally 5 or ten complete flushes will do the job. This helps get rid of excess nutrients in the plants that can make the smoke harsh. Some organic connoisseurs also aren’t big into fertilizers (even though you’re using organic fertlizer since you bought some BioGrow). Other people are freaked out that excess nitrogen gets into plants and is harmful to your health, however I’ve never seen any reputable studies say that this is the case.
Hang to dry
Once you’ve got all your beautiful nugs blooming and ready to cut down (the little crystals should turn milky white) you’re going to want to do a process called curing. It’s really pretty simple, but you can still screw up at this stage (MOLD!) . So get some string or whatever, and after cutting off all the fan leaves (you can use these leftovers to maker butter) you’re going to want to hang your plants in a dry, dark place. Oh, your grow space is empty now, so hang them in there and turn on the fans! Generally let them hang for probably at least 7 to 10 days. Once you can snap a smaller sized stem and hear a little snapping sound they are ready for the next stage. Which is to put them in some mason jars, or tupperware, or another air tight container. The inside of your buds will still have some moisture, and this will spread out to the buds as they are in the containers. For this reason you want to be careful that the container isn’t getting too moist or humid inside. Open it daily, take a whiff and investigate a few buds to check their wetness. Yeah, they smell nice don’t they!